In the last blog, we went over the things to consider before starting installation of SUPAWOOD panels, as well as general instructions for installing. These detailed instructions and examples are to ensure installation is as seamless and easy as possible onsite, ultimately avoiding untimely delays of the project.
Here, we go over how to measure ceilings correctly, to prevent ill-fitting panels come time for installation.
Measuring Ceilings
For basic measuring details, apply the same method as for measuring walls, set out points etc. In addition, you will also need to include the following:
Access hatches:
- Size
- Quantity
- Location
- Hinge Direction
Service Cut-outs:
- Aircon diffusers
- Lights
- Sprinklers
- Speakers
- Solid backing boards when cutting through slats and slotted panels
Drop-in tiles
SUPAWOOD requires the opening measurements, or edge of grid to edge of grid measurements for any special size or shaped panels.
For awkward-shaped ceilings, the triangulation method of measuring is recommended as per example below.
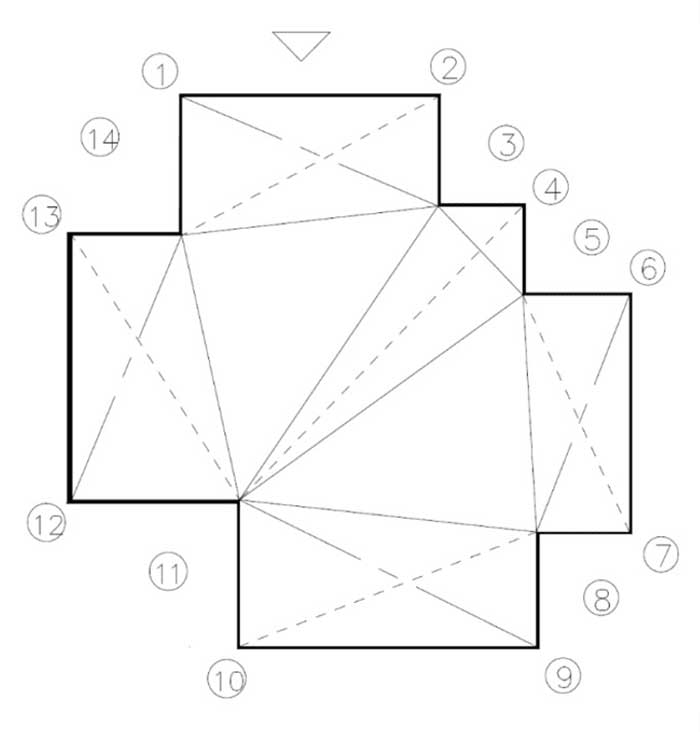
- This method can be used for curved walls by measuring to points every 100mm (tight curves) to 300mm (big curves) along the curved wall.
- This method can be used for locating columns or existing services by drawing triangles to these items also.
- Any area can be broken up into triangles, which is sufficient information for a CAD draftsperson to reproduce on a drawing.
Check out our next blog, for detailed instructions on the site measurements for walls before SUPAWOOD panel installation.
